Pages

Showing posts with label chocolate. Show all posts

Sunday, 11 August 2013

Homemade Chocolate Candies

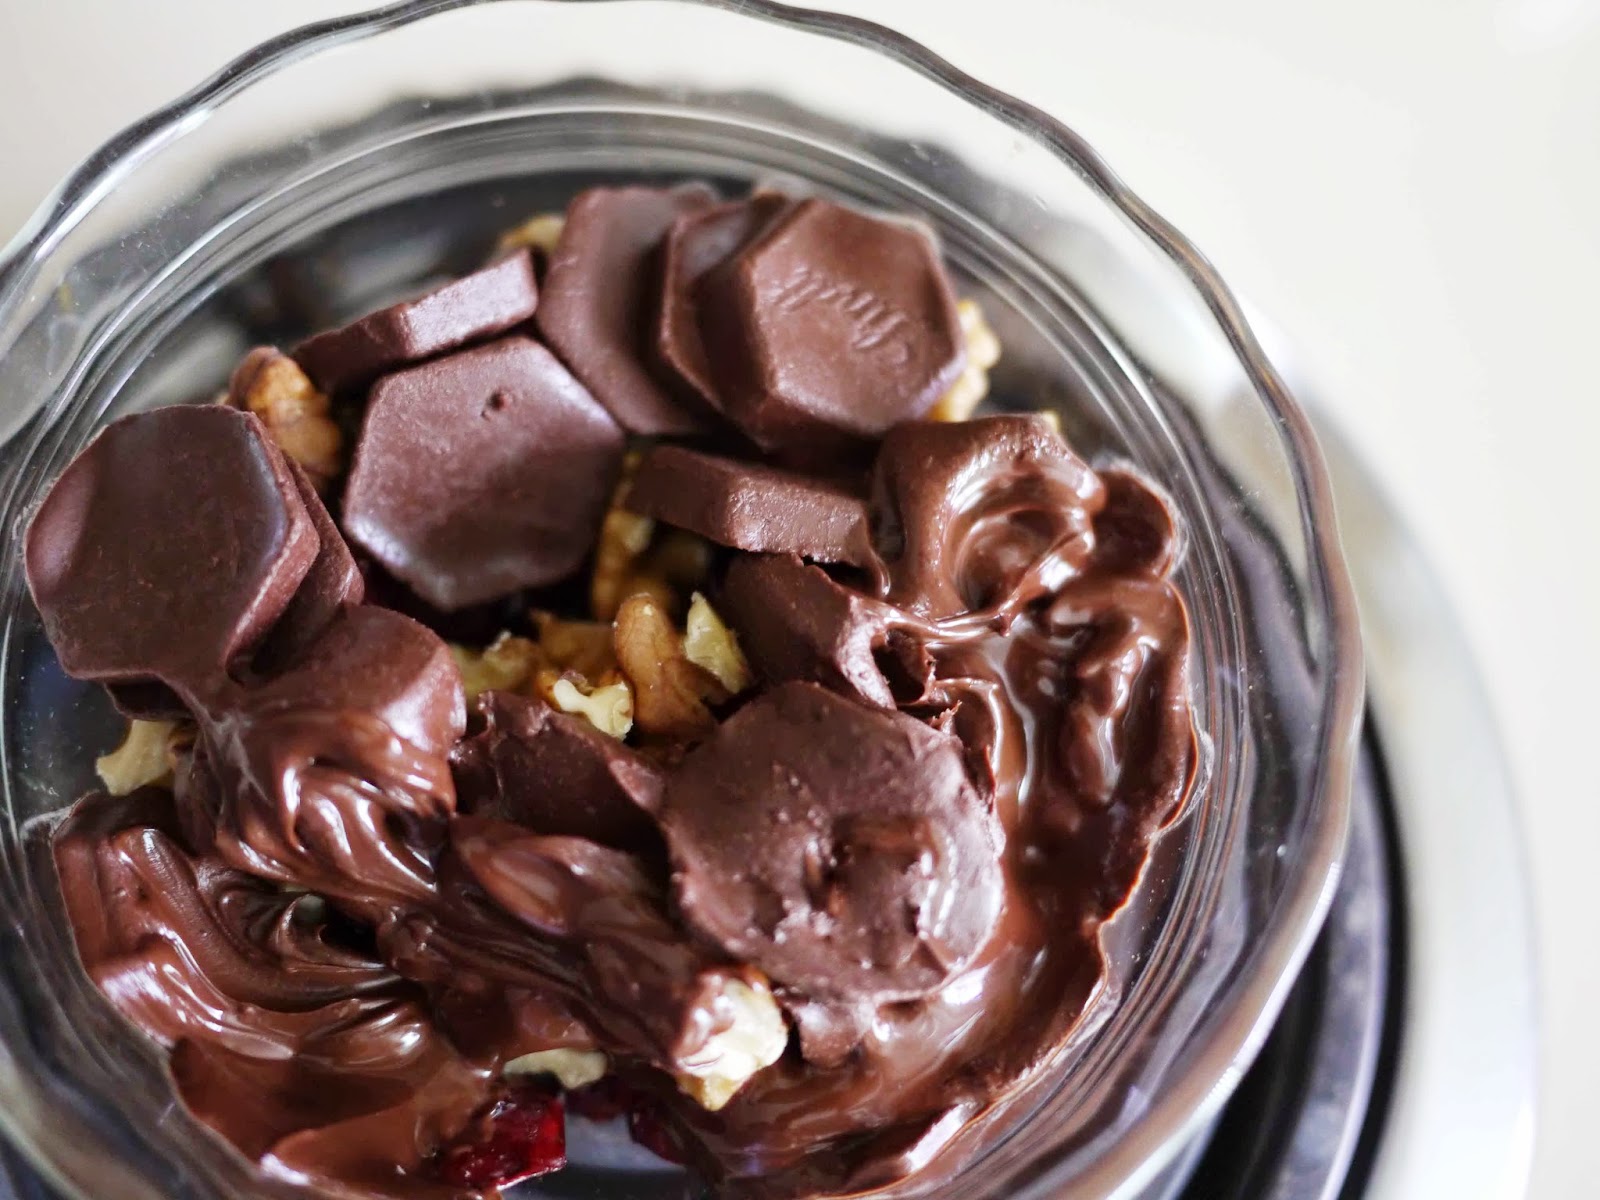
You know how ridiculously expensive those dark chocolate coated super fruits and nuts are? The ones that come in fancy re-sealable packages? They're actually really easy to make at home, and I decided to make a batch this weekend. I only used three ingredients: dark chocolate, dried cranberries, and walnuts. The chocolate I used came in a bulk 2.5 kg package from the Lindt Outlet near me. A trip to Costco took care of the other two ingredients. I didn't even need to turn on the stove or use the microwave oven to make these, which is perfectly fine with me, seeing how hot the summer weather already is. Here's the recipe:

Ingredients:
  • 1/2 cup dark chocolate chips 
  • 1/2 cup walnut pieces
  • 1/2 dried cranberries
Place chocolate chips in a heatable bowl, and over securely with cling wrap. Place on top of the fridge where a warm spot is for about an hour or so. A windowsill warmed by sunlight, or the interior of a car will work as well. When chocolate is melted, pour in dried fruit and walnuts, and stir to coat completely. Line the chocolate coated in pieces or small chunks on a lined baking sheet and slide into the fridge (freezer if impatient) for a 15 minutes to allow chocolate to firm up. Enjoy when chocolate has firmed up!


Thursday, 23 May 2013

Homemade Chocolate Candy Cups

A few years ago, one of the best things happened in our neighbourhood: a Lindt chocolate outlet store opened. Last month, there was a 50% off sale on all store items and we bought a couple 2.2kg bags of dark chocolate pieces. When there's that much chocolate sitting in the house, the biggest temptation is to just take some and try out recipes. So I tried making some chocolate peanut butter cups and some chocolate ice cream cups.

Chocolate Peanut Butter Cups:
Filling Ingredients:
  • 2 tbsp peanut butter (preferably slightly hardened chunks from the bottom of natural peanut butter jars)
  • 2 tbsp sour cream
  • 2 tbsp honey
  • 1/2 tsp instant coffee
  • 1/4 tsp salt
Shell: ~ 2 oz Dark chocolate
Materials: Twelve ~1 inch diameter paper liners

Melt chocolate in the microwave using 10 second bursts, and stirring in between. Spoon a teaspoon into each paper liner and coax to the edges using a small spoon or toothpick. Stir mixed filling ingredients and place in a piping bag (or plastic bag with a corner cut off) and pipe into the centre of the paper liner on top of the chocolate. Pour enough chocolate on top to cover the peanut butter filling, allow chocolate to re-solidify at room temperature and place into the fridge until ready to serve. 

Peanut butter fillings

Chocolate peanut butter cups. Just have to wait for these to firm up

Chocolate Ice Cream Cups:
Filling Ingredients: 
  • 1/3 cup whipped cream
  • 1 tbsp melted dark chocolate
  • 1 tsp sugar
Shell: ~ 2 oz dark chocolate
Materials: Twelve ~1 inch diameter paper liners

Melt chocolate in microwave using 10 second bursts, stirring in between. Spoon a teaspoon into each paper liner and coax chocolate all the way up the edge of the paper liner using a toothpick. Add more chocolate if needed to keep a thin but consistent layer all around. Place liners into the fridge to let the chocolate solidify and cool down. For the filling, fold sugar and melted chocolate into the whipped cream and spoon or pipe into the cooled chocolate shells. Place into the freezer to let the filling firm up before serving.

Frozen chocolate ice cream cups. There's a bit of frost on the surface of the ice cream. 

The truffle-y ice cream centres and thin crisp (from the freezer) chocolate shell make these such an enjoyable treat

Wednesday, 17 April 2013

Chocolate Chantilly Cake

I'm sure someone else has already invented this cake and gave it a name, but I haven't come across it yet, so I'm just going to call it a chocolate chantilly cake. It has four layers of crispy meringue (that probably won't stay crispy by the time the cake has chilled), and is frosted with chocolate chantilly. I guess it's sort of like a dacquoise, without the buttercream or nuts. It's also meant to be a simple recipe, because other than the little bit of cream of tartar and salt, there are only four main ingredients. Hope you enjoy this rich-tasting cake too! 

By the way, if you know of the proper name for a cake like this, please let me know! University has made me obsessively vigilant about not plagiarizing or taking credit for anything that's not mine. So I definitely don't want to do that here. 


The Recipe:
Ingredients:
  • 3 egg whites
  • 1/3 cup white sugar
  • 1/4 tsp cream of tartar
  • 1/2 tsp salt
  • 200 g dark, unsweetened chocolate (you can also use bittersweet)
  • 175 mL water

Stir sugar, cream of tartar, and salt together. In a clean bowl, whisk egg whites until they reach a soft peak (or when you don't see anymore clear, runny egg whites at the bottom of the bowl). Gradually add sugar as you continue to whisk. Beat to the egg whites are glossy and reach a stiff peak. Spread into four 1 cm, 15 cm diameter round disks with a stencil onto a lined baking sheet. I used the hole in a removeable bottom pie tin. Make sure the top is even. With the leftover egg whites, scoop into a piping bag (or plastic bag and cut off a corner) and pipe small rounds to use for decoration later. Bake in a 250F oven for 30-40 minutes until the meringue is crisp and dry, and you can easily remove them from the sheet without them sticking. Allow them to cool in the oven. 

In the mean time, bring the water to a boil in a small pot (covered). Take water off the stove and drop in 175 g of chocolate. Whisk to help chocolate melt into the water. Once the chocolate has completely melted and mixed with the water, pour into a large bowl, set over a bowl of ice water, and whisk as if you're whipping cream. The chocolate should begin to firm up and resemble chocolate frosting. Spread the whipped chocolate on each meringue disc generously, keeping 1 cm border clear of the edge, stacking each layer on top of the last as you go. With the remainder of the chocolate, spread onto the sides to cover the whole cake. Stick the mini meringues on the side for decoration. With the remaining 25 g of dark chocolate, you can melt and pipe shapes to add additional decoration to put on the cake. Chill for at least a few hours in the fridge, slice, and enjoy! 

My first time making this; not sure if it was supposed to look like this. 


Meringue disks, before baking


Tada!

Monday, 17 December 2012

Snowy day squares

One of the reasons why I like winter is the snow that accompanies it. While others groan and complain about the snow, and avoid mentioning the word with a taboo-like compliance, I absolutely enjoy every glittering moment of snowy Canadian winters. This winter, however, although the first snow arrived weeks earlier than usual in early November, it disappeared almost the moment it hit the ground. This was followed by a week of atypical warm, rainy weather. It was as if winter was trying to tease me.

So now it's mid-December and the weather is 7°C, cloudy and rainy (the wrong type of precipitation!). With no snow to brighten up these long hours of darkness, I think I might just fall into a winter blue. Luckily, there are these snowy squares, with their fluffy, bright, white top layer and their intense, dark, chocolatey bottom layer to tie me through these snowless days.

The Recipe: 
Brownie layer ingredients:
Sifted dry ingredients:
  • 1/3 cup whole wheat flour
  • 1/3 cup de-fatted soy flour (supposed to enhance flavour, can use wheat flour if that's more convenient for you)
  • 1/4 cup unsweetened cocoa powder
  • 1/4 crushed wheat bran
  • 1/4 tsp salt
Wet ingredients: 
  • 3 whole eggs
  • 1/3 cup brown sugar 
  • 1/3 cup unsalted butter
  • 1/4 cup milk
  • 1/3 cup hot water
With electric beaters, beat eggs and sugar until mixture is a thick, creamy yellow mixture. In a separate bowl, melt unsalted butter and stir in milk (any fat content is OK) so that the mixture is just warm. Add and blend sifted flour to egg mixture in three batches, alternating with the milk & butter mixture, starting and ending with flour (ie. flour, milk, flour, milk, flour). Beat in the 1/3 cup recently boiled water just before pouring into a lined 8-inch square pan and placing in a preheated 325°F oven for 20 minutes. 

Marshmallow cheesecake layer: 
  • 3 egg whites
  • 2 tbsp white sugar
  • 1 tsp lemon juice
  • 1/2 cup light cream cheese
  • 2 tbsp yuzu preserve (purchased at Korean, Chinese, or large mainstream supermarkets, price ~ CAN$4 – 6/L)
  • 1/2 tsp ground fresh ginger
  • 1/4 cup milk
  • 2 tbsp cornstarch
In the meantime, we prepare the snowy layer. Very simply, make a meringue by beating egg whites to soft peaks, add granulated sugar and lemon juice, and beat until you get stiff peaks. Set aside. Beat together cream cheese, orange marmalade, ginger, milk, and cornstarch until mixture is smooth. Add egg whites by quickly and vigorously beating a third of egg whites in first, then gently folding in the rest. Take the brownie-bottom layer out from the oven, pour snowy layer on brownie layer and spread with a spatula or spoon to make an even layer. Return pan to oven, lower temperature to 300°F and bake for 25 minutes or until top looks like lightly toasted marshmallow. Allow squares to cool to room temperature, and place in an airtight container to refrigerate until square is completely chilled. Slice into squares of desired size and enjoy. 

Note: if you really like the top layer (like I do), you can just make the marshmallow cheesecake layer, cut into individual pieces and freeze it. When eaten frozen, it melts in your mouth like ice cream and is a summertime delight. 

Light and fluffy toasted marshmallow cheesecake layer

Out of the pan, a little scraggly on the sides, but who cares? Just slice off the four edges (for your taste-testing:-)

Chilled and cut into squares. Yum!