Pages

Sunday 17 November 2013

Herb Rice Cakes

Growing up in a Chinese family, I used to have a bowl of white rice everyday at dinner. My dad always told me to really chew and savour the first bite of rice because it tastes sweet when a mouthful of salivary amylase turns the starch into sugars. As much as I liked that sweetness of the first bite of rice, I liked it more when my mom occasionally burnt the rice at the bottom of the rice cooker. My brother and I used to scrape off the patches of burnt rice into our bowls. There's a heartiness to toasted rice that I really like, and plus, it brings back good memories, so when I found a bowl of leftover cooked rice in the fridge, I made these immediately. 

Recipe (not really a recipe...just a method of using up leftover rice)
Ingredients:
  • 2 cups cooked rice
  • 2 egg whites
  • 1/2 cup shredded cheese
  • 1/2 cup chopped parsley
  • oil for the skillet (opt.)
Stir all ingredients together, and drop spoonfuls onto a hot, non-stick skillet (or an oiled skillet). Let them sear for a few seconds on high heat, then flip the whole dollop over with a spatula and compress into a patty. It's easier to press it down on the seared side without the rice sticking to the spatula. Let it cook and get toasted by heating a few minutes on both sides. Best enjoyed while they're warm because the cheese will be gooey inside. It tastes even better with some mayo or Miracle Whip on top. 

Cheese (didn't want to wash a grater, so I chopped it instead)

parsley

Rice cakes

Sunday 11 August 2013

Homemade Chocolate Candies

You know how ridiculously expensive those dark chocolate coated super fruits and nuts are? The ones that come in fancy re-sealable packages? They're actually really easy to make at home, and I decided to make a batch this weekend. I only used three ingredients: dark chocolate, dried cranberries, and walnuts. The chocolate I used came in a bulk 2.5 kg package from the Lindt Outlet near me. A trip to Costco took care of the other two ingredients. I didn't even need to turn on the stove or use the microwave oven to make these, which is perfectly fine with me, seeing how hot the summer weather already is. Here's the recipe:

Ingredients:
  • 1/2 cup dark chocolate chips 
  • 1/2 cup walnut pieces
  • 1/2 dried cranberries
Place chocolate chips in a heatable bowl, and over securely with cling wrap. Place on top of the fridge where a warm spot is for about an hour or so. A windowsill warmed by sunlight, or the interior of a car will work as well. When chocolate is melted, pour in dried fruit and walnuts, and stir to coat completely. Line the chocolate coated in pieces or small chunks on a lined baking sheet and slide into the fridge (freezer if impatient) for a 15 minutes to allow chocolate to firm up. Enjoy when chocolate has firmed up!


Sunday 4 August 2013

Summer Salad: one of many!

We plant tomatoes in our backyard. As a result, in our mid- to late summer months, we have tomato for almost every meal everyday, and still have extra to share a big bag with all our friends. I never get sick of these sweet, juicy, fruits because I help plant them and well, because they're so sweet and juicy. These little banana tomatoes are my favourite. They're firm but not starchy, and work well when used raw or cooked or baked. Here is one of the colourful summer salads I made with these tomatoes.

Salad components: 
  • tomatoes
  • bell peppers
  • avocados
  • lime (juice)
  • canned beans (I used romano beans)
  • sliced black olives
  • salt and pepper
  • olive oil
Simply dice tomatoes, bell peppers, and avocados. Toss everything in lots of fresh lime juice, with some olive oil, and salt and pepper. Add canned beans and olives and toss again. If you want, you can toss the tomatoes, bell peppers, and avocados separately so you can arrange the salad layers. 

Lots of fresh banana tomatoes from the backyard

Yummy avocado

Yummy salad

All the beautiful, colourful layers

Monday 22 July 2013

Microwave test cookies

Sometimes, extreme hot summer weather coincides with the craving for freshly baked homemade cookies. I didn't want to turn on the oven to bake though. Just the thought of having a 350 F oven in the house was enough to make me sweat. But I couldn't leave that cookie craving unsatiated, so I looked for an alternative. Can cookies be baked in a microwave oven? I tested five different times and power settings...
Microwave used: 1200 watt Panasonic microwave
Flour for a small batch of cookies: whole wheat flour on left, peanut flour on right; sugar, salt, baking powder in middle

Dough with wheat bran stirred in

Cookie before "baking"

After baking 

Cookie bottoms after baking

Sample 1: heated at 70% power for 1 min 30 sec. Looked well baked and dry on top, but had a burnt patch on inside. 

Sample 2: heated at 50% power for 1 min 30 sec. Appeared light and dry on the outside with a small burnt patch inside. 

Sample 3: Heated at 100% power for 50 seconds. Burnt marks on the outside with centre converted into charcoal. Emitted acrid burnt smell; potentially carcinogenic. 

Sample 4: heated at 100% power for 30 seconds. Exterior looked slightly translucent, moist and soft. Inside texture resembled stale dry cake. 

Sample 5: heated at 100% power for 35 seconds. Appeared just like the one above but slightly drier.  
Overall, cooking at 50% power for 1 min 30 seconds appeared to give the best result. The cookie was crunchy through out , but I had to cut off the burnt patch. None of the power and time settings were able to achieve results a conventional oven would because the microwave cooks food from the inside out. Since my cookies were rather thick, I guess rolling them out thinner next time might help get a more even "bake". The microwave seems to be better at cooking food that remains a higher moister content after cooking and so maybe I should be trying a microwave cake recipe instead. Saving that for next time...

I guess this will have to do for now until the weather cools a bit and I can actually face using the oven. Hope you enjoyed this sequence!

Sunday 7 July 2013

Citrus Angel Biscuits

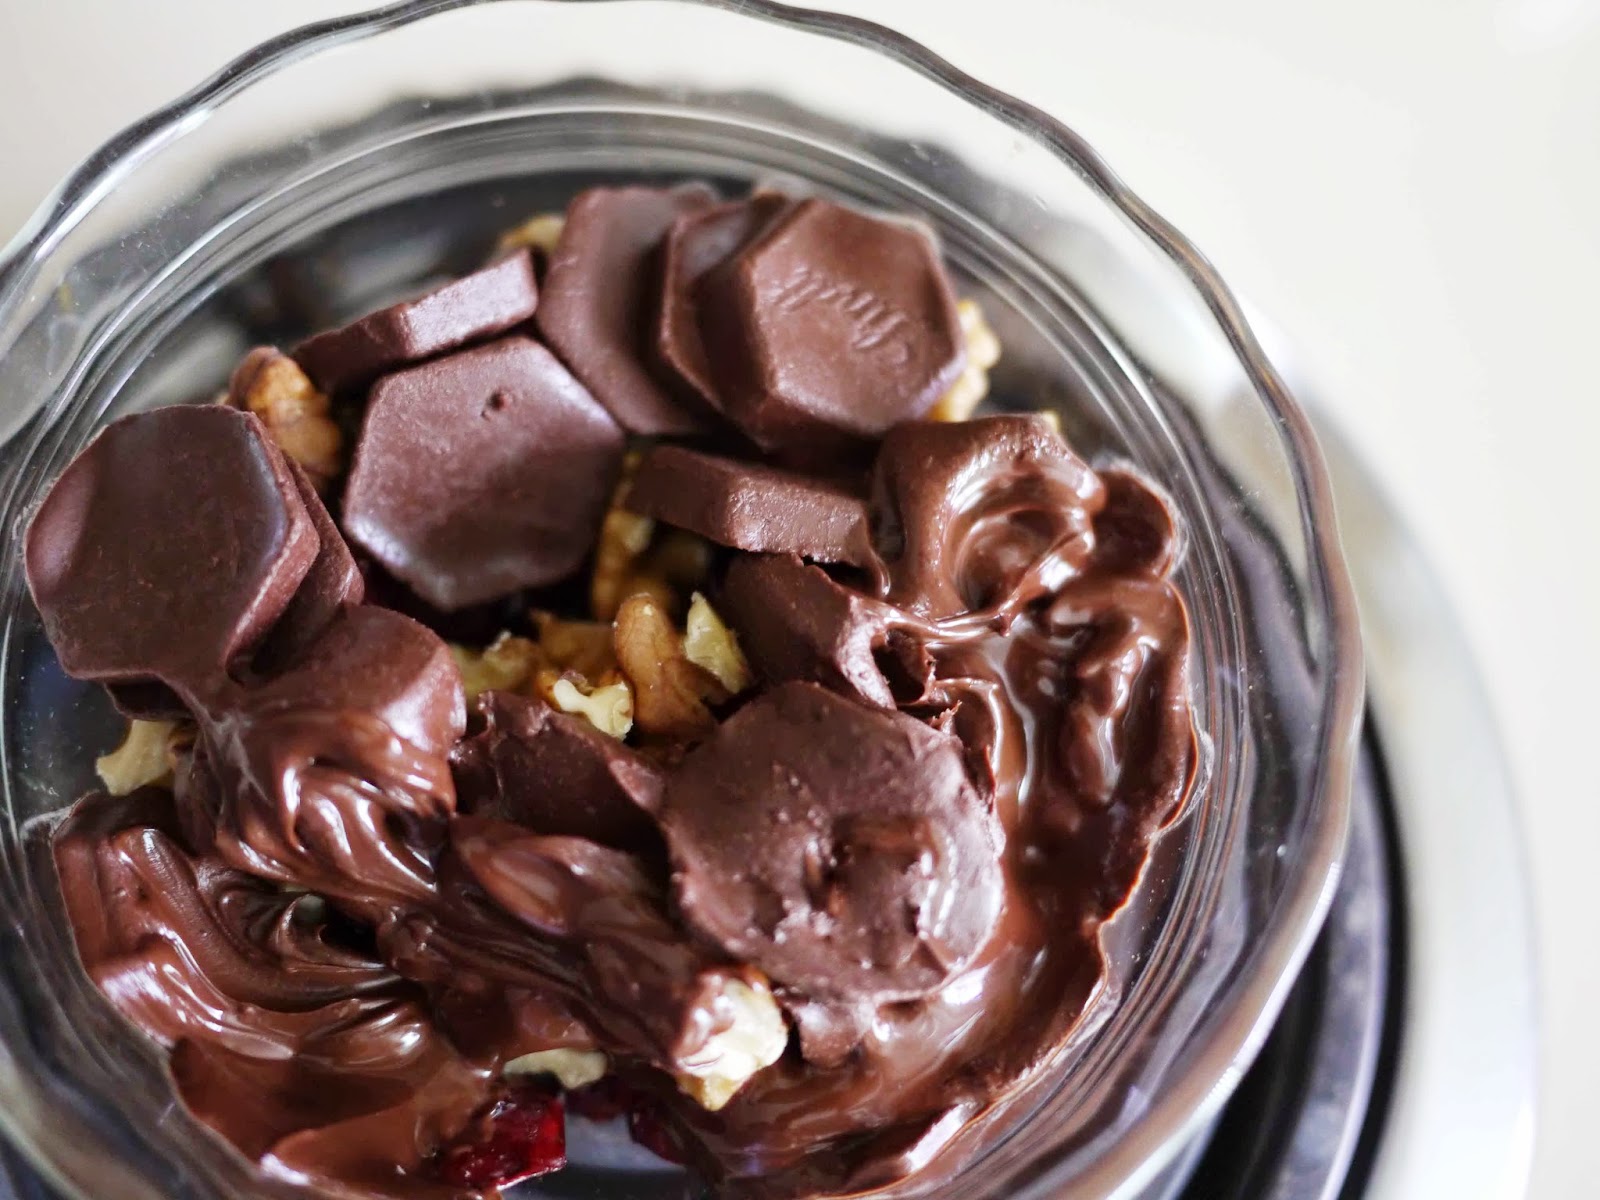
It's July, the middle of summer, and I feel like baking. I've been suppressing the urge to bake for a few weeks because it's been so hot, and I didn't want to have to reve up the air condition just because I've decided to do some baking. Anyway, I couldn't resist any longer, and since this weekend is a little cooler, I baked some angel biscuits. These biscuits are a little sweet and tangy because I slather some zesty citrus glaze on them before baking. The glaze also gives them some wonderful, summer colour: yellow, orange, and green. Can you guess what citrus zests I used?

The Recipe:
Dry ingredients:
  • 2 cups whole wheat flour
  • 1 tbsp sugar
  • 1/2 tsp cardamom
  • 1 1/2 tsp dry instant yeast
Wet ingredients:
  • 1/4 cup butter
  • 1/3 cup plain cream cheese
  • water
Glaze:
  • 1 orange
  • 1 lemon
  • 2 limes
  • 3 tbsp sugar
Stir dry ingredients together. Cut butter and cream cheese into little chunks and rub into the flour mixture until the largest piece of butter of cream cheese is about the size of a split pea or lentil, and evenly distributed. Add water until a soft dough forms. Gather dough into a dough ball, wrap loosely with plastic wrap and place in the refrigerator for a few hours to let the dough soften and rise. 

To make the glaze, wash the orange, lemon, and limes, and grate the zest into a bowl. Add sugar and mix to evenly distribute the zest. To make it spreadable, squeeze either the juice of the lemon, or the two limes over the sugar. 

Roll out dough to 1/4 inch (or ~3/4 cm) thickness, fold the dough in half so that there are two layers. Cut out into squares or circles or whatever shape you want your biscuits to be, brush citrus glaze over biscuits, and slide into a hot oven to bake. Bake at 425 F (~220 C) for 10 to 12 minutes. Let biscuits cool on a rack and enjoy!

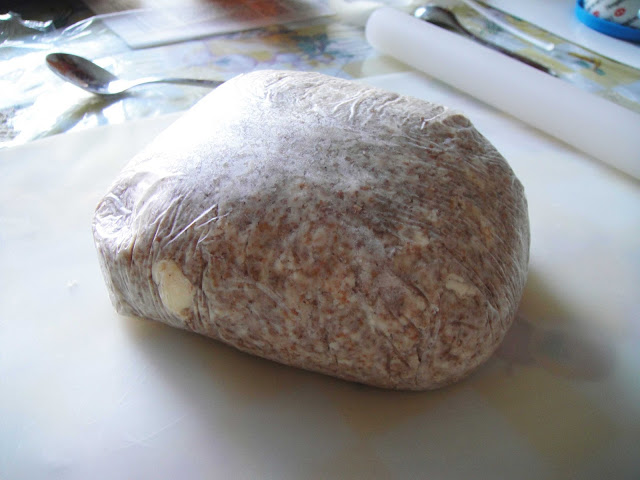
Rested and risen dough with a particularly large chunk of butter
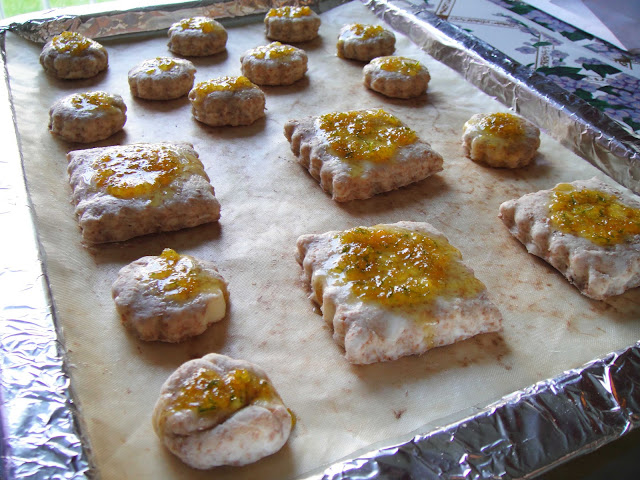
Ready to be baked

Cooling and waiting to be devoured


Sunday 2 June 2013

Cranberry Cheesecake: A very late post

I hope you're looking forward to summer! What is the one aspect of summer that you're most looking forward to? Maybe you like the long hours of daylight, the endless blue skies, all the outdoor activities, family gatherings and holidays, the beach, or glorious sunsets? Or perhaps you like watching the magnificent summer thunderstorms? I'm mostly looking forward to enjoying those cool, sweet treats that the hot sun makes me crave. Here is a recipe for a no-bake cheesecake filling that I made last year around this time. I'd promised to post about it when I made those mung bean potato biscuits (remember?) but never got around to writing the post. Well, here it is, a year late, but still a recipe to make.

The Recipe (makes two 8" tarts):
Pie crusts (follow recipe here)

Filling:
  • 300 mL fat free, plain greek yogurt
  • 400 mL light, plain cream cheese 
  • 3/4 cup frozen cranberries
  • 1/2 cup sugar
  • 2 tbsp milk
  • 2 tsp gelatin (powder)
  • some water
Mix together yogurt, cream cheese, and milk until a smooth mixture forms. It's best to let the cream cheese come to room temperature so it softens before blending. You can also soften the cream cheese in  the microwave using the defrost setting. 

Melt and cook frozen cranberries in a pan. Pour some water on the bottom of the pan until the bottom is covered with a layer of water. Cook until cranberries pop and soften. Pour into blender and blend until an even mixture forms. Strain to remove large pieces of skin and seed. Return to pan, add sugar, stir to dissolve, and cook until thickened, like a syrup. Take off heat and stir in gelatin to dissolve. Add to cream cheese and yogurt mixture and stir to combine. Pour into prepared pie tins, and place in the refrigerator to set for at least 4 hours before serving. 

Note: you can set aside some cream cheese and yogurt mixture to decorate the top if you like. 

This is the yogurt I used. I also added the jam to the rest of the cranberry puree (it's only a small amount). 

Frozen cranberries.

Mung bean potato biscuits baked into a tart crust

Adding the filling

Swirls for decoration

You can also make it one colour. Texture after setting. 

Thursday 23 May 2013

Homemade Chocolate Candy Cups

A few years ago, one of the best things happened in our neighbourhood: a Lindt chocolate outlet store opened. Last month, there was a 50% off sale on all store items and we bought a couple 2.2kg bags of dark chocolate pieces. When there's that much chocolate sitting in the house, the biggest temptation is to just take some and try out recipes. So I tried making some chocolate peanut butter cups and some chocolate ice cream cups.

Chocolate Peanut Butter Cups:
Filling Ingredients:
  • 2 tbsp peanut butter (preferably slightly hardened chunks from the bottom of natural peanut butter jars)
  • 2 tbsp sour cream
  • 2 tbsp honey
  • 1/2 tsp instant coffee
  • 1/4 tsp salt
Shell: ~ 2 oz Dark chocolate
Materials: Twelve ~1 inch diameter paper liners

Melt chocolate in the microwave using 10 second bursts, and stirring in between. Spoon a teaspoon into each paper liner and coax to the edges using a small spoon or toothpick. Stir mixed filling ingredients and place in a piping bag (or plastic bag with a corner cut off) and pipe into the centre of the paper liner on top of the chocolate. Pour enough chocolate on top to cover the peanut butter filling, allow chocolate to re-solidify at room temperature and place into the fridge until ready to serve. 

Peanut butter fillings

Chocolate peanut butter cups. Just have to wait for these to firm up

Chocolate Ice Cream Cups:
Filling Ingredients: 
  • 1/3 cup whipped cream
  • 1 tbsp melted dark chocolate
  • 1 tsp sugar
Shell: ~ 2 oz dark chocolate
Materials: Twelve ~1 inch diameter paper liners

Melt chocolate in microwave using 10 second bursts, stirring in between. Spoon a teaspoon into each paper liner and coax chocolate all the way up the edge of the paper liner using a toothpick. Add more chocolate if needed to keep a thin but consistent layer all around. Place liners into the fridge to let the chocolate solidify and cool down. For the filling, fold sugar and melted chocolate into the whipped cream and spoon or pipe into the cooled chocolate shells. Place into the freezer to let the filling firm up before serving.

Frozen chocolate ice cream cups. There's a bit of frost on the surface of the ice cream. 

The truffle-y ice cream centres and thin crisp (from the freezer) chocolate shell make these such an enjoyable treat